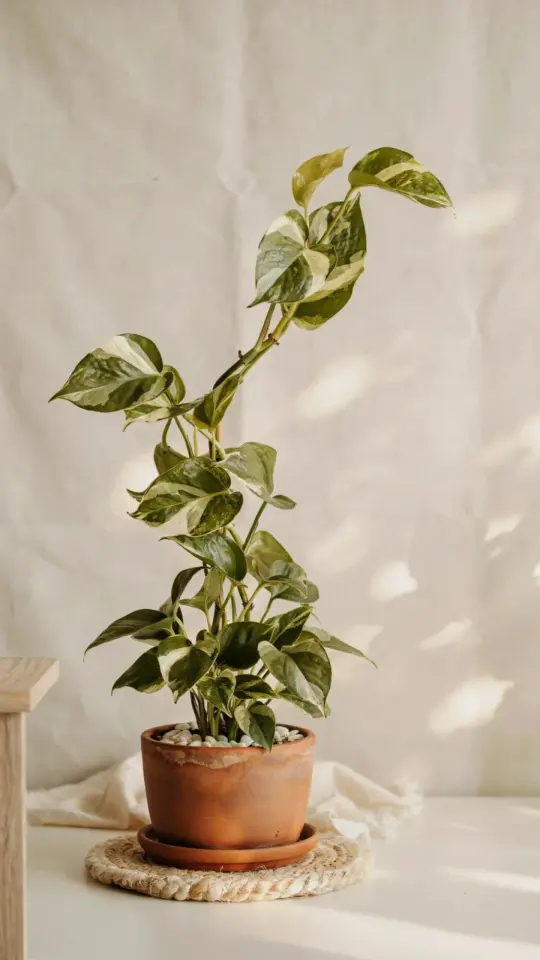
Saturday morning, 9 a.m., coffee in hand, and I’m staring at a pothos plant before and after situation that honestly shocked me. That sad, leggy vine that had been sulking on my bookshelf for two years? It now looks like it’s been hitting the gym and eating its greens. The pothos plant before and after difference is so extreme that my neighbor literally asked if I bought a new one. Nope. Same plant. Same pot (well, same style of pot, new one because I dropped the old one, but that’s a separate clumsy story). All I did was give it a $5 moss pole, fresh soil, and a little bit of patience. So for anyone who thinks their sad, trailing pothos is past saving, this one’s for you. Let’s get into it.
## The Before: Denial, Leggy Stems, And A Lot Of Bare Vine
My pothos wasn’t dead. It wasn’t even sick. It was just… pathetic. Long, pale stems stretching out into the living room with leaves only at the very tip, like a green version of a balding man combing his hair over. The vines were six feet long but the plant looked sparse and sad. The roots were busting out of the nursery pot, and the soil was so depleted it looked like cosmic brownie mix, dry and crumbly. I kept telling myself it was “artistic” to have a plant that looked like a green octopus drowning in a terra cotta pot. Yeah, no. It wasn’t artistic. It was just poor plant parenting. The funny thing is, I knew exactly why it got so leggy. It wanted to climb. Pothos plants naturally grow up trees in the wild, and when they have nothing to grab onto, they just trail and stretch, looking for something that isn’t there.
## The $5 Moss Pole: Hardware Store Moss, PVC, And Zero Shame
Here’s the thing about buying a moss pole at a garden center, they’re like $25 for a plastic stick that doesn’t even hold moisture. So I made my own. I bought a 4-foot PVC pipe from the hardware store for about $2, (the guy cut it for free, nice guy), and a bag of sphagnum moss for $3. You soak the moss, wrap it around the pipe, and secure it with fishing line or zip ties. Honestly, it took me longer to find my zip ties than it did to actually assemble the pole. Then you just stick it into the pot next to the plant. That’s the entire DIY moss pole routine. If you want the full step-by-step with a video, there are a million tutorials out there, but the real secret is making sure the moss stays damp. Dry moss is a decoration, wet moss is a climbing gym for your pothos.
## Fresh Soil, Less Drama: The Repotting Reality Check
Ok so, this is the part where I realized I had been neglectful. The root ball was so compacted that water was just running straight through the pot and out the drainage hole, like it was on a waterslide. I spent a good 15 minutes gently teasing the roots apart. There were a lot of them. Too many, honestly. I mixed up a batch of potting soil with a handful of perlite and some compost, my standard “I hope this works” blend. The plant went into a slightly bigger pot, fresh dirt, and then I carefully pinned the longest vines up against the moss pole using some soft plant clips. Now, here’s the really important part. When you pin a vine to a moss pole, don’t just pin the leaf. Pin the little brown nub on the stem. That’s the aerial root. That’s what digs into the moss and anchors the plant. If you don’t get that nub touching the moss, your pothos will just sit there looking confused.
## Three Weeks After: Those New Leaves Changed My Whole Personality
I’m not exaggerating when I say the transformation started within ten days. The aerial roots gripped the moss almost immediately, (it was wet, which helped), but the real payoff started at the three-week mark. The new leaves that are coming in are absolutely massive. The old leaves were maybe the size of a silver dollar. The new ones? They’re bigger than my entire hand, dark green, and they have these beautiful, deep splits that I’ve never seen on a houseplant pothos before. That’s the thing nobody tells you about a pothos plant before and after a moss pole. The size difference isn’t just incremental. It’s dramatic. It’s the difference between a shrub and a tree. The plant also seems to have decided to grow upward now, which creates a completely different, more architectural look. It’s not a trailing plant anymore; it’s a vertical statement piece.
## The Aesthetic Payoff: Not Your Grandma’s Moss Pole (Okay, Kind Of)
Look, I know moss poles can be ugly. If you have a pristine, modern apartment with white sofas and chrome accents, a brown, gnarly pole might not fit the vibe. But here’s the thing, you can make them look intentional. I saw this idea on Pinterest (and yes, I saved it, hence this houseplantstyle post) where someone wrapped their moss pole with green fishing line to make it look less like a torture device for plants. Another friend of mine painted her PVC pipe green *before* wrapping it in moss, so when the moss dried and gaps showed, you didn’t see white plastic. I’ve also seen people use coco coir poles, which are a bit more textured and look nicer, but honestly, they dry out faster than sphagnum. For my money, the sphagnum pole works better and you can stuff the loose ends of the moss into the crevices to make it look neater.
For the indoor plant decor angles, here are a few quick things that really helped the final look:
– Put the moss pole behind a newer, smaller pothos to completely hide the stem, so it looks like one giant lush plant.
– Use a heavier, ceramic pot on the bottom so the top-heavy pole doesn’t topple over when you brush past it.
– Keep the moss damp with a spray bottle. Wet moss looks darker and richer, which actually looks pretty against the green leaves.
– Position the plant in bright, indirect light. Direct afternoon sun will fry the moss and dry it out in an hour, and the leaves can scorch through the wet fiber.
## What I’d Do Differently Next Time (Because There’s Always Something)
Hindsight is 20/20, right? If I were doing this again, I’d invest in a taller pole from the get-go. My pothos has already outgrown the 4-foot pole in about two months, and now I have a messy situation where the top shoot is bending sideways to find something to grab. I also wouldn’t be so aggressive with the rehydration. I soaked the moss so heavily that water ran down the pole and made the soil soggy. That, plus my overwatering paranoia, kept the pot too wet for about a week. The leaves started to yellow slightly, and I thought I’d ruined the whole project. It was fine. Plants are resilient, but they’re also stubborn. It took them a while to figure out the new watering routine. Also, be prepared to water the moss pole itself. The plant will start prioritizing those aerial roots, so if the moss dries out, the roots will die, and your plant will get mad.
## The “Before And After” Verdict: Do It This Weekend
There are plant projects that are complicated. This is not one of them. This is a one-hour project that pays you back with bigger leaves, stronger vines, and a much happier plant. Your pothos doesn’t care about trends. It literally just wants something to climb. That used to be my curtain rod, which was weird, and now it’s the pole. A $5 moss pole and a bag of dirt turned the saddest plant in my house into my favorite piece of living room decor. It genuinely feels like I got a brand-new plant for a fraction of the cost, and there’s something really satisfying about looking at that huge new leaf and knowing you built the thing that made it happen. So if your pothos is looking a little sad, grab some moss and a pipe, spend the 90 minutes, and let time do the heavy lifting. Your plants will thank you. And your Instagram feed will, too.
Leave a Comment