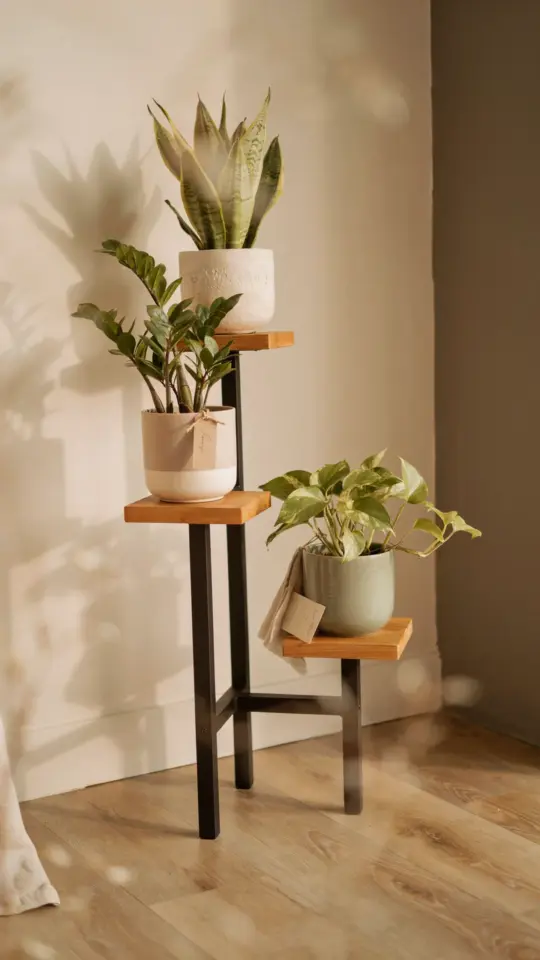
If your window sills have turned into a jumble of pots and your floor is crowded, a DIY tiered plant stand from scrap wood can solve both problems at once. But after building a few myself and seeing friends make the same errors, I realized most tutorials skip the real pitfalls. This is not a perfect step by step guide. It is a list of the common mistakes I have made, and the fixes that actually work for a scrap wood tiered plant stand in a small space.
Not Checking the Stability of Your Scrap Wood Plant Stand
The first mistake is assuming any old scrap will hold a row of ceramic pots. I used a piece of pine that had a hidden split once. It looked fine until I watered the top shelf and the whole thing tipped sideways. A wobbly tiered plant stand is dangerous for your plants and your floor.
Before you cut anything, set each board on a flat surface and rock it. If it wobbles, set it aside for kindling. Look for solid, straight pieces with no cracks running through the grain. Plywood scraps are great for the shelves because they resist warping. For the uprights, use hardwood offcuts like oak or poplar if you have them. Softwood like pine works only if it is at least 3/4 inch thick and free of knots near the edges.
Skipping the Level Step for Your Vertical Plant Display
You can have the prettiest boards in the world, but if the shelves are not level, your pots will slide off or lean. I learned this when I nailed my first vertical plant display together by eye. Every time I watered, the pot on the second shelf slid forward and dripped onto the one below.
Here is how to avoid that mess. Use a small torpedo level on each shelf before you attach it. Shim the uprights with a thin piece of cardboard if your floor is uneven. For a freestanding stand, check the bottom edge with the level as well. If the base tilts, the whole structure will tilt. A few extra minutes with a level saves you from constant pot rearranging.
Forgetting to Measure Pot Heights for Indoor Plant Display
One of the most frustrating mistakes I see is a beautiful indoor plant display with shelves too close together. You buy or build the stand, place your plants, and realize the tallest pot barely fits under the shelf above. The leaves get squished, and you cannot water without pulling the plant out.
Measure your tallest pot, including any drip tray or saucer, and add at least two inches of clearance. Then measure the next tallest and plan the spacing accordingly. I like to cut a scrap piece of wood to that height and use it as a spacer when I mark the shelf positions. That way I never guess. If you plan to rotate plants, leave even more room so you can swap pots without removing shelves.
Overcomplicating the Design for Small Space Plant Styling
It is easy to get carried away with angles, slanted shelves, or interlocking joints when you see fancy pictures online. For a small space plant styling project, simplicity wins every time. I once built a three tier stand with angled sides and mortise and tenon joints because I wanted it to look professional. It took four weekends, and it still wobbled because my cuts were off by a millimeter.
Stick to a straight ladder design or two uprights with three or four horizontal shelves. Screw the shelves into the uprights from behind, or use corner brackets for extra strength. A simple rectangular frame with pocket holes takes less than an hour and holds just as many pots as a complicated one. Your plants do not care about fancy joinery. They care about being stable and getting light.
- Plan the width of each shelf so it fits your largest pot plus some breathing room. Sixteen inches wide works for three 4 inch pots or two 6 inch pots.
- Keep the depth to 8 or 10 inches so the stand fits on a side table or in a corner without sticking out.
- Paint or seal the wood if you plan to water plants on the stand. A coat of polyurethane or furniture wax stops water rings and prevents the scrap wood from swelling.
Using the Wrong Fasteners for a DIY Plant Stand
Nails and pocket screws are not the same thing when you are building a scrap wood plant stand. I used finishing nails on one of my early projects because I wanted a clean look. Within a month the shelves had loosened and were sagging under the weight of wet soil.
Use wood screws, not nails, for any load bearing joint. For a small stand, two inch long deck screws with coarse threads grip the wood firmly. Pre drill the holes, especially near the ends of boards, to prevent splitting. If you are using plywood shelves, use fine thread screws to avoid
#
Leave a Comment